"> Michelle @ A Tipsy Giraffe - A Tipsy Giraffe - Page 27

Raspberry Buttermilk Waffles

Raspberry Buttermilk Waffles

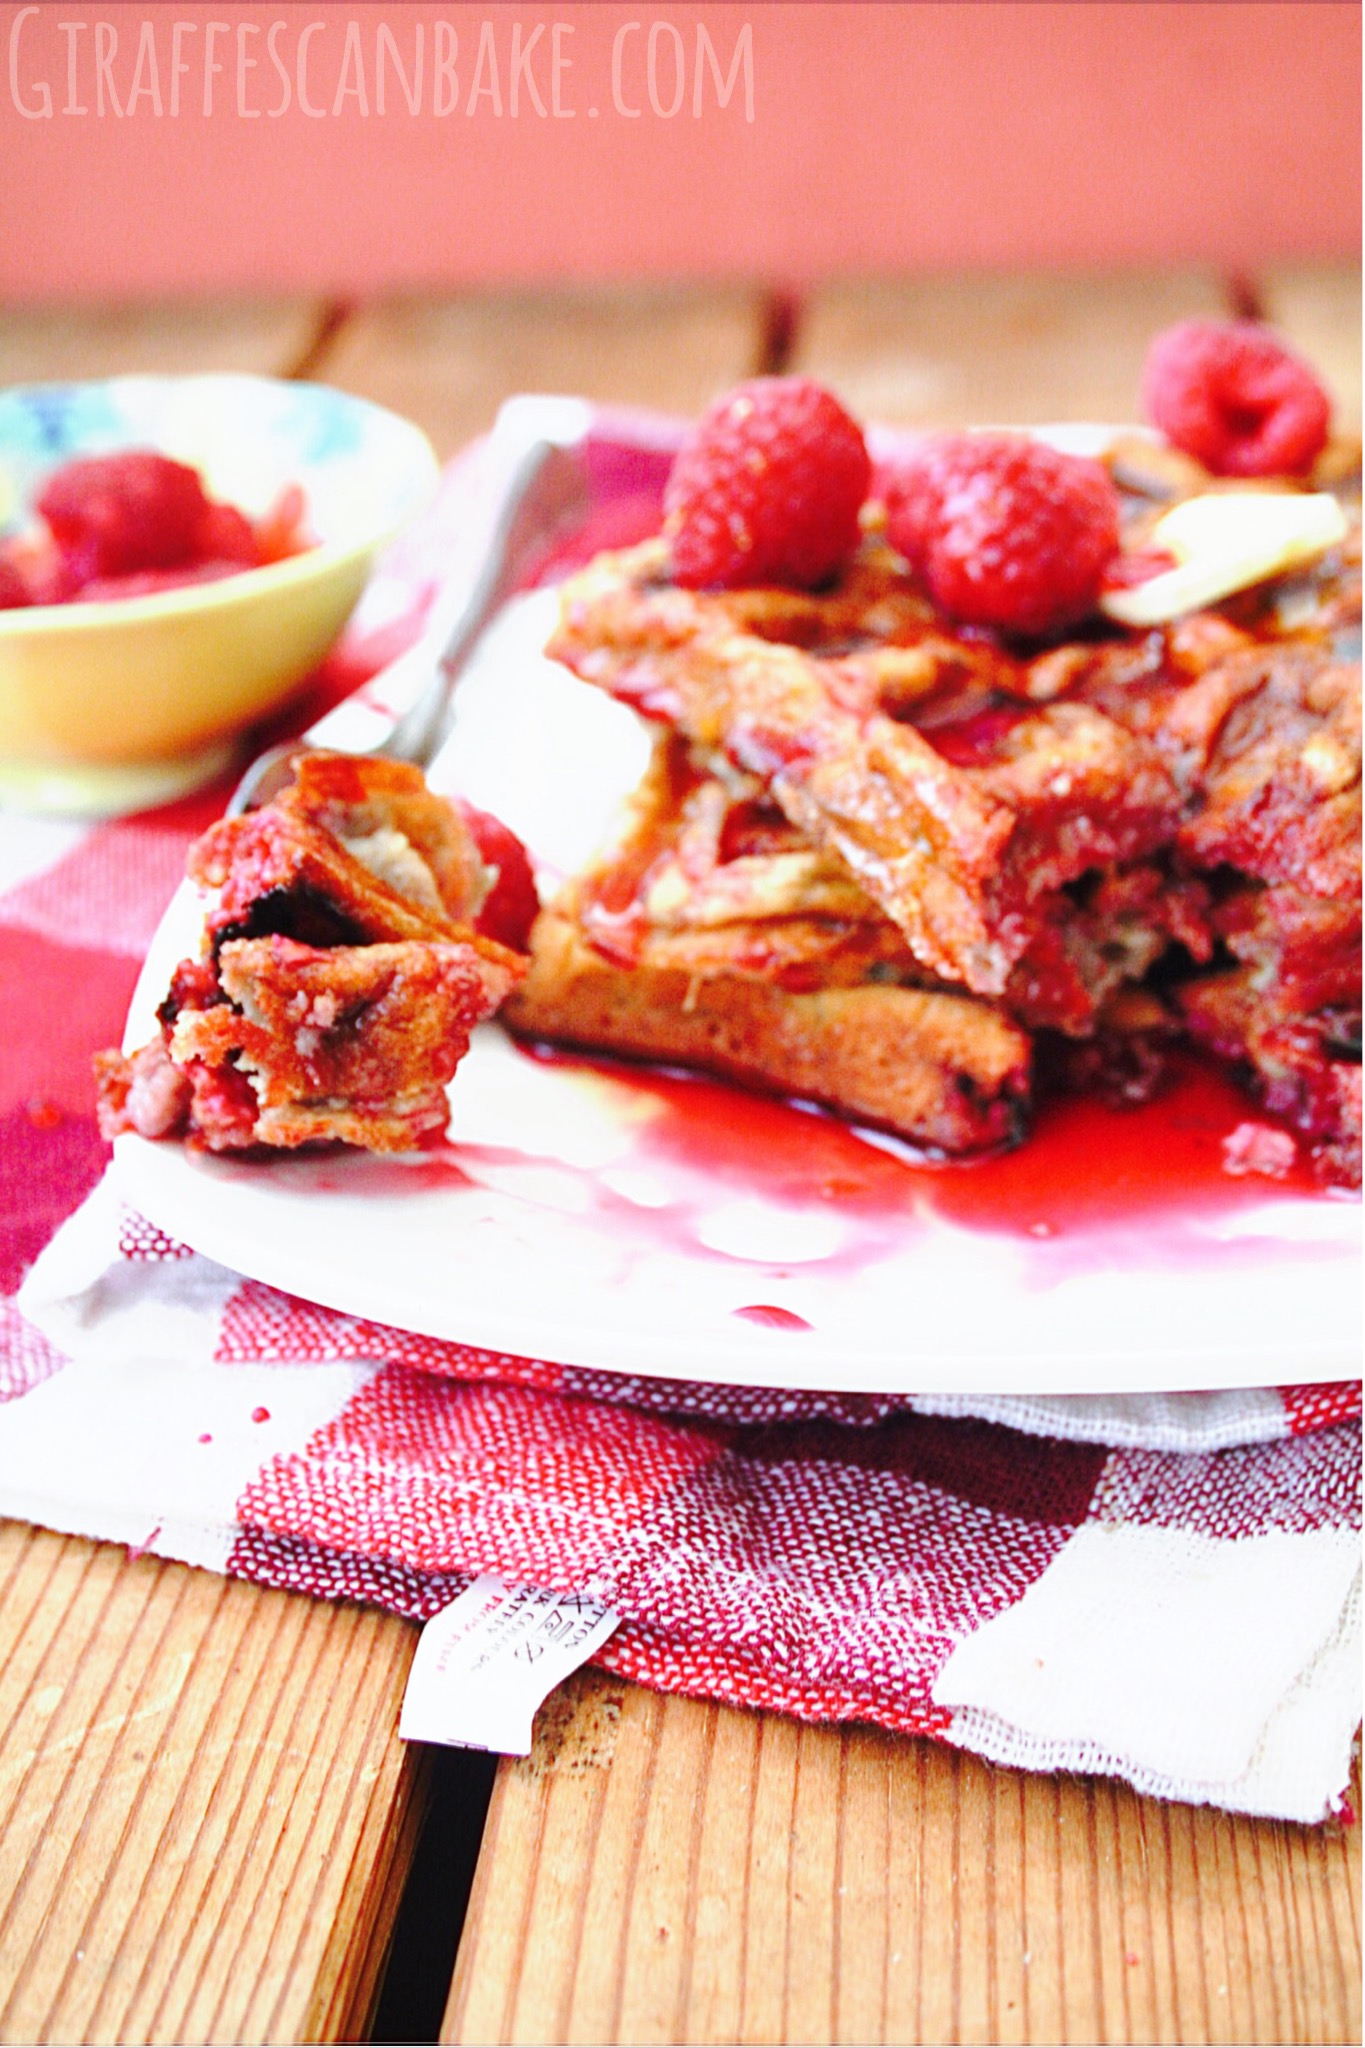
Ah, waffles! Crispy on the outside, fluffy on the inside – a delicious, sweet breakfast! Waffles are definitely more of an American thing (and a Belgian thing, I guess!), that’s not to say us Brits don’t enjoy a good waffle you just don’t see them as much here. America has their pancakes and waffles, we have bacon and baked beans! I’m not really a big breakfast person in general, I love breakfast foods I just tend to eat them later in the day (I know, I know I should eat breakfast everyday but I don’t) – I’m a big fan of Brinner personally and these waffles definitely fit that bill!

Raspberry Buttermilk Waffles


I haven’t made a lot of waffles in my time and that’s mostly because I didn’t own a waffle iron or maker. The wonderful people at Kitchen Craft recently sent me a couple of their products to try out and this Non Stick Waffle Maker was one of them, needless to say I was very excited to try it out! The first thing I made was Cinnamon Raisin Peanut Butter Waffles, but me being the numpty that I am I lost the notes for that recipe, they were super yummy though so I will try them again soon and write down the recipe for y’all. Next up was these waffles though, and luckily I still have that recipe! This waffle maker is great, it’s not your more standard waffle iron that you plug in, this one you heat on the stove top. I imagine this waffle maker takes a little longer than a waffle iron (I’ve not used a regular waffle iron so I can’t say for sure) but it does a wonderful job and it gives you crispy, fluffy waffles that don’t stick to the maker! One of the biggest advantages to this maker over an iron is it takes up way less room, the handles are removable and then it’s approx 8″ – 5″ in size – easily put away somewhere, out of the way and ready to use again soon! I have a gas stove top, but the instructions say it works on every type of top other than induction. All in all, I would have been very happy to pay for this – particularly because I have a very small kitchen with very limited storage. 

Raspberry Buttermilk Waffles

These waffles are made with buttermilk which is essential in getting that fluffy texture inside, if you can’t get your hands on buttermilk it’s easy to make your own – just add 1 tbsp of white vinegar or lemon juice to each 250ml regular milk and leave to stand for 5 minutes. I used raspberry puree in the batter, however you could also use raspberry preserves or jam and I think it would be really yummy – particularly while we’re out of berry season if you didn’t freeze a bunch during the summer. And I served these with raspberry syrup for that added kick of raspberry flavour, they’re really good with maple syrup too though! 

Raspberry Buttermilk Waffles

It’s been a long week and I’ve had pretty much no time to bake or blog, here’s hoping next week is a little less hectic so I can spend more time in the kitchen and more time on here with you guys! Of course, last week was the second part of the big Fiesta Friday Anniversary Party and what a party it was! I hope you all had fun and aren’t too tired out from the festivities to party again this week! I come baring these yummy waffles, perhaps they’ll serve as a bit of a hangover cure for some of you (you know who you are!). Click here to join in the party, all are welcome!As well as the lovely Angie, we have awesome co hosts too – Sonal and Josette

Do come hang out with me on social media, even if I’m too busy to spend a lot of time blogging I’m still pretty active on there and would love to see what you guys are up to. You can find me on TwitterInstagramPinterest and Facebook

Also, if you liked this post, why not enter your email address into the subscription box on my side bar to get my future posts directly into your inbox!

[This recipe was created using items I received for free, however all opinions and words are my own. This blog post may contain affiliate links]

Raspberry Buttermilk Waffles

Raspberry Buttermilk Waffles
Yields 12
Crispy on the outside, fluffy on the inside - delicious raspberry waffles
Write a review
Print
Ingredients
  1. 200g raspberries, fresh or frozen
  2. 230g plain flour (all purpose)
  3. 1.5 tsp baking powder
  4. 1 tsp bicarbonate of soda (baking soda)
  5. 1/4 tsp salt
  6. 3 large eggs, separated
  7. 115g unsalted butter, melted
  8. 75g caster sugar (super fine granulated sugar)
  9. 230ml buttermilk
  10. 1tsp vanilla extract
  11. Syrup for serving
Instructions
  1. Preheat your waffle maker on a medium high flame (or equivalent setting on waffle iron)
  2. Put 150g of your raspberries in a blender or food processor and blend until smooth. Roughly chop the remaining 50g raspberries and stir into the puree. Set aside.
  3. Mix the flour, baking powder, bicarb and salt in a large bowl and set aside.
  4. In another bowl, whisk the egg yolks, butter, sugar, buttermilk and vanilla together.
  5. Pour the wet ingredients into the dry ingredients and very gently whisk together until smooth.
  6. Whisk the egg whites until you have stiff peaks (the whites will hold peaks and not flop over when whisk is lifted out). Fold the egg whites into the batter mix until combined. Gently fold in the raspberries until well dispersed.
  7. Use about 1/3 cup of batter per waffle (dependent on the size of your waffle maker) and cook each side until a deep golden brown - about 3 minutes on each side.
  8. Serve immediately with butter, syrup and more raspberries
A Tipsy Giraffe https://www.atipsygiraffe.com/
Raspberry Buttermilk Waffles


Sharing with…

Fiesta FridayFoodie FriDIY, Show Me Saturday, Scraptastic Saturdays, Sweet and Savoury Sunday, Hit Me With Your Best ShotInspire Me WednesdayCreate It ThursdaySuper Saturday

Chocolate Chip Cookie Ultimate Layer Cake

Chocolate Chip Cookie Millionaire Cake

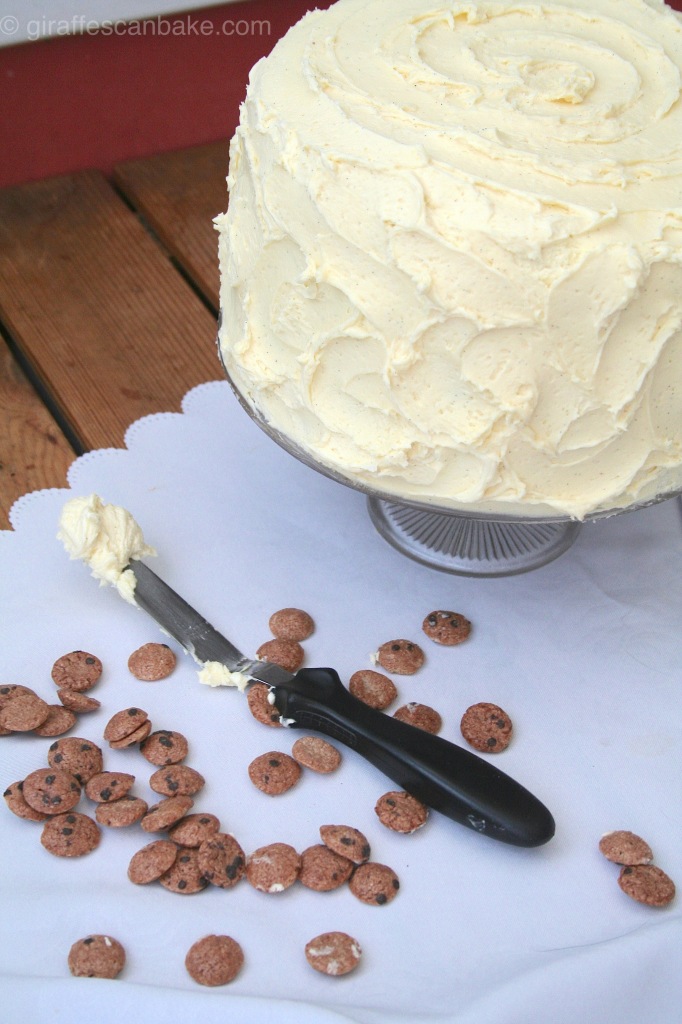
Happy First Fiesta Friday Anniversary Party Part Two!! Week two is all about celebration meals and desserts, so I come bearing cake! I knew I had to go all out for this cake, in case you hadn’t noticed I kind of have a thing for dessert! So I couldn’t just turn up with any old cake, it had to be a real show stopper! And here it is, looking innocent enough when it’s uncut – but all that creamy, whipped vanilla frosting is hiding so much decadence and the perfect cake for such a celebration! I just wish I had better photos of it for you guys, it seems I picked the greyest day of the year to photograph this cake! Also, I’m a bit early to the party but it was either gonna be early or late, so I figured I’d get some cake ready for everybody when they arrive! 
Chocolate Chip Cookie Millionaire Cake

There’s so many wonderful desserts and sweet treats out there, sometimes it’s hard to choose what you want. Cookies? Yum! Cake? Awesome! Cheesecake? Delicious! Mousse? Amazing! So which are you going to choose? Can’t decide? I have good news for you friend – now you can have it all! All in one epic cake! Yep, that’s right! All of that is in unassuming cake, who would believe it? Just wait until you cut yourself a slice… 

Chocolate Chip Cookie Millionaire Cake

Would you look at that! Let’s talk about what we have here shall we? You might wanna sit down for this… 

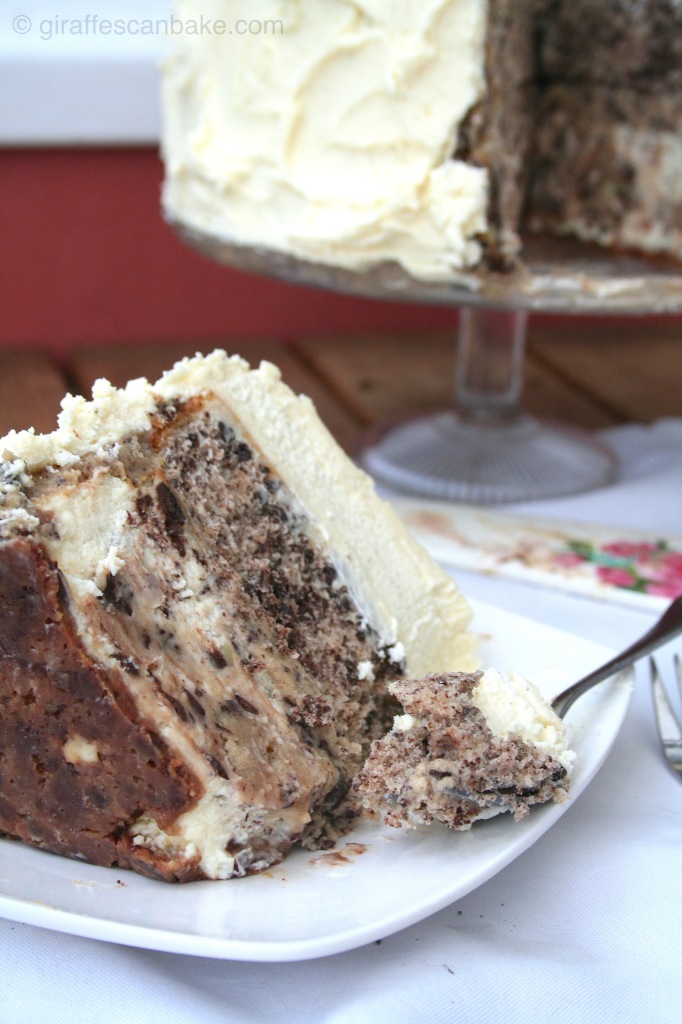
First we have a chocolate chip cookie crust with a cookie dough cheesecake – that’s right, delicious cheesecake made with both cream cheese and mascarpone for that added creamy sweetness with eggless cookie dough right there in it! It’s so decadent it should probably be illegal… and we’re only on the first layer! 

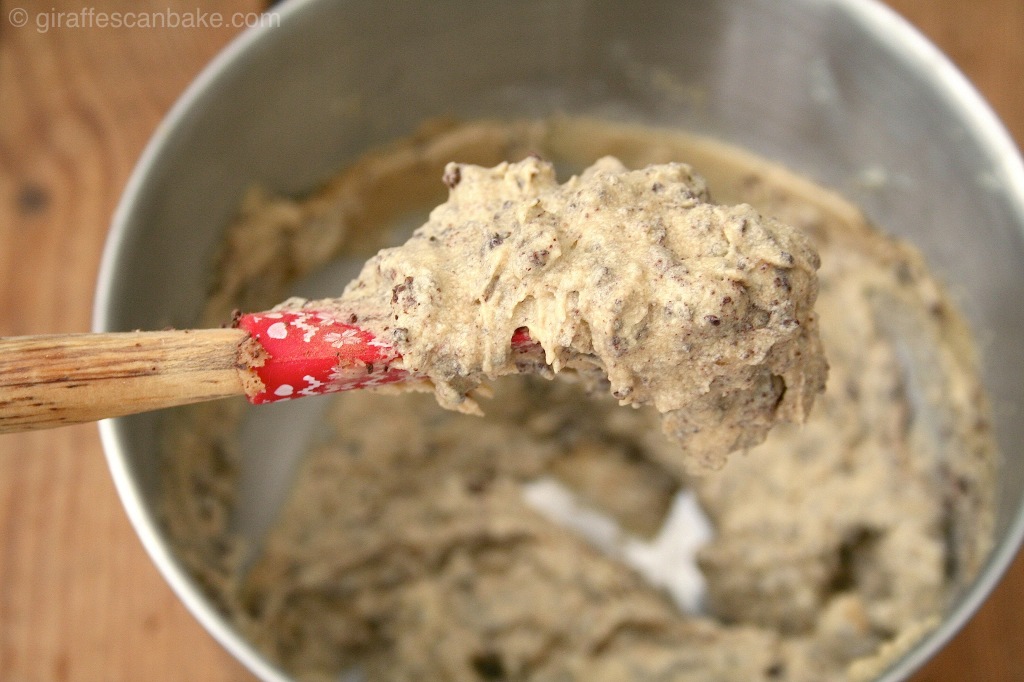
Next we have a layer of cookie dough frosting, oh yeah! This is a recipe from I am baker that I’ve wanted to try ever since I saw it and it did not disappoint. It’s creamy and sweet, and tastes just like a smooth cookie dough. So good! 

Then we have a layer of chocolate chip vanilla cake. A light, fluffy cake with finely chopped and chunks of chocolate throughout – it’s the chocolate chip cookie’s cakey cousin! 

On top of that we have vanilla bean mousse – a sweet, light mousse to offset the decadent layers below. Don’t underestimate it though, this mousse is intense, smooth and creamy and will make you reaffirm the virtues of good vanilla! 

We’re not done yet, we have more cookie dough frosting to come – it covers the bottom two layers of the cake. Because you cannot have too much of this stuff, seriously!

And last, but certainly not least, the cake is covered in a beautifully smooth and delicious whipped vanilla bean frosting. I used this recipe for it, but I used vanilla bean because this cake deserves the very best! You wouldn’t take a Ferrari to a Ford garage for a paint job would you? 

And there we have it, the most decadent and outspoken cake I have ever made or eaten! Does anybody need a fan?
Chocolate Chip Cookie Millionaire Cake

I’m not going to lie to you and tell you this cake is a walk in the park to make, it is going to take you a good amount of time to make. But oh boy is it worth the effort! And each separate component is simple enough to make, but you are basically making four desserts and then frosting it – you’re not just going to be able to whip it out in a couple hours one afternoon. I did all the baking and made the mousse one day, then put it all together and made the frostings the next day. 

Chocolate Chip Cookie Millionaire Cake

It’s also not the cheapest cake to make. There’s a lot of different ingredients you’ll need, and you really will want to use vanilla pods rather than extract (you’ll need extra too though!), usually I would say go with what works for you and your budget – but you really want the vanilla to shine in this cake, it’s worth the extra money. 

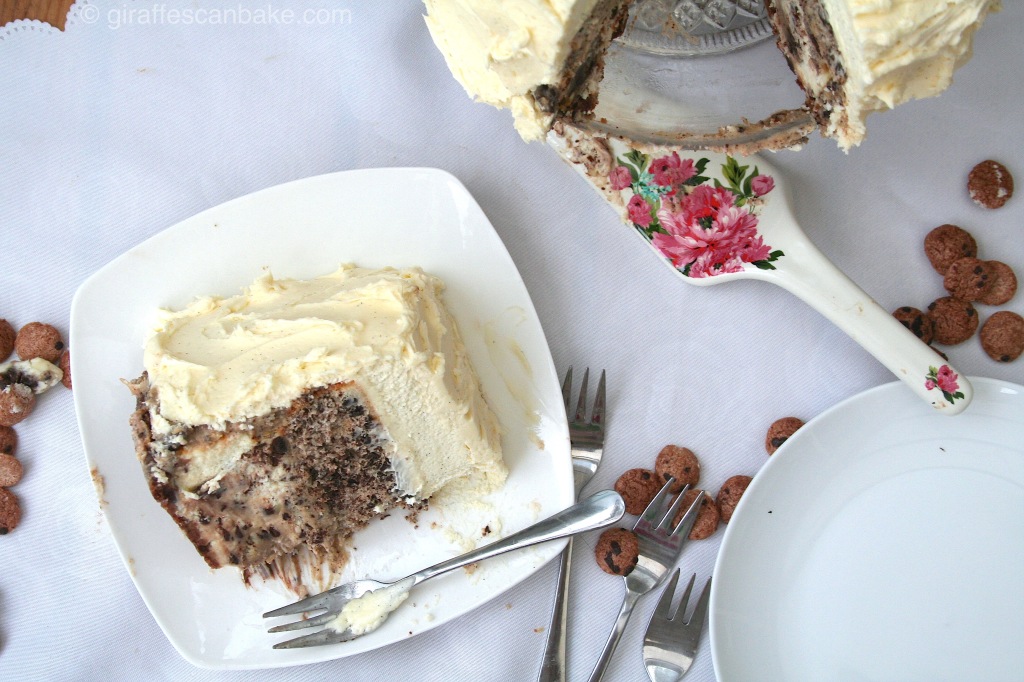
This is only an 8″ cake, but I can guarantee you it’s going to go a long way! Even the biggest sweet tooth will have trouble finishing a slice much bigger than an inch thick, this really is decadence at it’s finest!  I’m not even going to pretend I’ve thought about the calories and fat in this cake! When you’re making a cake like this one, there’s no point in even worrying about that! After all, this isn’t a cake you’re going to be making every week – there’s nothing wrong with indulging occasionally, we are celebrating after all! So don’t sweat it, life’s too short not to treat yourself every now and then! 
Chocolate Chip Cookie Millionaire Cake

The great thing about this cake too is each layer is delicious on it’s own. If the idea of baking this whole thing is a bit intimidating or you just don’t have the time, just make one part and you’ll still be in heaven! I’m definitely going to make the cheesecake part by itself again one day, and that mousse is so smooth and sweet I’m going to have to think of another dessert to incorporate it in soon! And the cookie dough frosting? You can bet your butt I’m going to be putting that on some cupcakes! So while the cake at a whole is an amazing cake worthy of any celebration, the individual components shine just as brightly on their own! 
Chocolate Chip Cookie Millionaire Cake

Before I get to the recipe, just wanna remind you to come hang out with me on social media! You can find me on Twitter,Instagram,Pinterest and Facebook

Also, if you liked this post, why not enter your email address into the subscription box on my side bar to get my future posts directly into your inbox!

I am, of course, taking this to the second instalment of the big FF anniversary party – there’s plenty to go around so dig in! If you’ve not partied with us before, now is a great time to join! Especially with our wonderful co hosts – Nancy and Selma. And of course, a big shout out and thank you to a lovely host Angie, for keeping this awesome party going for a whole year and inviting us along each week, here’s to many, many more! 

Now, recipe time! There’s a lot to go through and a lot of steps, so I’m going to break it up for you in two ways. I’m going to type it up right here in the post, step by step for the entire cake, in the order you should be doing it. Then I’m going to include printable recipes for each component so you can print them out or pick and choose the parts! 

Don’t let the length of this scare you away! Yes it’s going to take a while, but it really isn’t very hard to do each individual part, I promise! 

For the cheesecake

Cookie Dough Balls:

  • 115g unsalted butter, softened
  • 110g brown sugar
  • 2 tbsp milk
  • 2 tsp vanilla extract
  • 140g plain flour (all purpose)
  • 1/4 tsp salt
  • 65g mini chocolate chips

Beat butter and sugar in a bowl until creamed and combined. Add milk and vanilla, and beat to combine. Mix in flour and salt until you have soft dough, stir in chocolate chips. Roll into small balls, about 1 tsp of dough per ball. Place balls on a baking sheet lined with parchment paper and place in the freezer while you make the cheesecake batter.

Crust:

  • 145g chocolate chip cookies (I used Maryland, use your favourite brand or homemade – crunchy is better than chewy in this case)
  • 60g unsalted butter, melted

Line the bottom of an 8″ pushpan or springform pan with parchment paper and lightly grease the sides.

Put the cookies in a food processor and blitz until you have fine crumbs. Stir in melted butter. Press into the bottom of the prepared cake tin until firmly packed and evenly spread out. Place in fridge. 

Cheesecake: 

  • 650g full fat cream cheese, room temperature
  • 100g full fat mascarpone, room temperature
  • 150g caster sugar (superfine granulated)
  • 1 tsp vanilla extract
  • 3 large eggs, room temperature
  • 80g mini chocolate chips

Preheat the oven to 170C/325F.

Put both cheeses, sugar and vanilla in a large bowl (or the bowl of your stand mixer) and beat together on medium until smooth and combined. Add eggs one at a time, beating in between each addition until fully combined. Only beat until combined, you don’t want too much air in the batter. 

Pour half of the batter into the prepared crust. Take the cookie dough balls out of the freezer and stir into the remaining batter, along with the chocolate chips. Pour into the pan and spread out evenly, it might be a bit lumpy that’s okay. 

Bake for 60-70 minutes, until the edges are set and the centre is still a bit wet looking. Turn the oven off and crack the door an inch or two, leave the cheesecake in the cooling oven for 1 hour. Remove from oven and cool completely on a wire rack. Remove cooled cheesecake from pan and chill in the fridge for 4 hours or overnight. 

For the cake

  • 2 large egg whites, room temperature (save the yolks for the mousse)
  • 1 whole egg, room temperature
  • 165ml whole milk
  • 1 1/4 tsp vanilla extract
  • 160g plain flour (all purpose)
  • 1 tbsp corn flour (cornstarch)
  • 200g caster sugar (superfine granulated)
  • 1 tbsp baking powder
  • 1/4t tsp salt
  • 85g cold butter, cubed
  • 115g dark chocolate

Preheat oven to 180C/350F. Line bottom of an 8″ pushpan/springform pan with parchment paper, grease the sides. 

In a bowl combine the egg whites, whole egg, 45ml of the milk and vanilla. Set aside. 

Put the flour, cornflour, sugar, baking powder and salt into the bowl of your stand mixer, remove 1 tbsp of the mix and place in a small bowl for later. Using the paddle attachment, mix the dry ingredients on low for 30 seconds. Add the butter pieces one at a time, keep mixer on low until you have a crumbly mixture. 

Add remaining 120ml milk and mix on low for 5 minutes, scrape down sides and bottom of bowl. Add egg mixture in 3 batches, beat until light and fluffy (about 4-5 minutes). 

Put the dark chocolate in a food processor and pulse for 1 minute, until you have finely chopped chocolate with a few larger chunks. Stir the reserved tbsp of flour into the chocolate then stir into the cake batter. 

Pour batter into prepared pan and bake for 30-40 minutes, until a skewer comes out clean or with a few moist crumbs (you’ll probably get melted chocolate on it, but as long as there’s no raw batter you’re good). Cool in pan for 5 minutes, then remove and cool completely on wire rack. Wrap and keep at room temperature for up to 24 hours. 

For the mousse 

  • 500m double cream (heavy cream), divided in half
  • 1 vanilla pod, seeds scraped out
  • 1 tsp powdered gelatine, unflavoured
  • 3 tbsp cold water
  • 3 large egg yolks
  • 75g caster sugar (superfine granulated)

Measure out 250ml of the cream (leaving the other 250ml in the fridge) and add to a medium saucepan. Add the scraped vanilla bean seeds and the pod itself. Heat on medium low heat until bubbles just start to form around the edge. Remove from heat, cove and leave to steep for 30 minutes. 

Prepare an ice bath – fill a large bowl with cold water and ice cubes, have a slightly smaller bowl sitting in the water (without water spilling into top bowl). 

Put the 3 tbsp cold water in a small bowl and sprinkle gelatine over, stir. Leave the bloom for 5 minutes. 

In a large bowl, whisk together the egg yolks and sugar until well combined and smooth. Remove vanilla pod from cream and gradually pour the warm cream into the egg mix, whisking constantly. Pour back into the saucepan. Cook over a medium low heat, stirring constantly with a wooden spoon until mixture is thickened and coats the back of the spoon – approximately 5 minutes. Do not boil. Remove from the heat and add gelatine mix, whisk to combine. 

Pour the custard mix into the top bowl of the ice bath – leave to cool and thicken, whisking occasionally, until room temperature – about 20 minutes. Set aside. 

In your stand mixer with the whisk attachment, whisk the remaining cream on a high speed until soft peaks form (peaks will begin to form but they’ll barely hold their shape, the tips will fold over almost immediately after lifting whisk out). Gently fold half of the whipped cream into the custard until combined, then fold in other half. 

Now it’s time to start assembling the cake

Assembly Part 1

Line your 8″ pan (springform works best, pushpan is good too) with parchment paper along the bottom and around the sides – the parchment paper should be sticking up over the top. It can be a bit tricky to line the sides, use tape if you need to. 

Place your sponge cake into the bottom of the pan. Pour the mousse on top and spread evenly as possible. Place in the fridge until set, 2-3 hours. 

Cookie Dough Frosting

  • 150g brown sugar
  • 115g unsalted butter, softened 
  • 175g plain flour (all purpose)
  • 1 tsp vanilla extract
  • 1/2 tsp salt
  • 10-12 tbsp milk 
  • 150 mini chocolate chips 

Beat the sugar and butter on medium speed until smooth. Add flour, vanilla and salt and mix on low until combined. Keeping the mixer on lower, add 1 tbsp of milk at a time, add as much milk as you need to get the desired consistency, since you’ll be spreading this you’ll want it fairly thin. Stir in chocolate chips. 

Assembly Part 2

Take your cheesecake out of the fridge and put on the place or platter you’ll be serving the cake on. Spread a layer of cookie dough frosting on top of the cheesecake, you can make this as thick as you like but make sure to leave enough to cover the sides. 

Take sponge cake and mousse layers out of the fridge and carefully remove from pan – peel away parchment paper from sides and bottom. Holding it by the cake layer, place it on top of the cheesecake layer. 

Spread the remaining cookie dough frosting around the sides but only over the cheesecake and sponge cake layer, leave the mousse bare. Try to spread it as smooth as possible, but don’t worry about it too much. Place in fridge. 

Whipped Vanilla Frosting

  • 375g unsalted butter, softened and cubed
  • 475g icing sugar (powdered/confectioners)
  • 3 tbsp milk
  • 1 vanilla bean, seeds scraped. 
  • 1 tsp vanilla extract
  • pinch of salt

Put the milk in a small bowl and add the vanilla bean and seeds. Set aside. 

Put the butter in your stand mixer bowl and beat with paddle attachment on medium until very pale (almost white) and creamy, about 8 minutes. 

Add milk (remove vanilla bean first), icing sugar, vanilla extract and salt and mix on low for 1 minute. Increase speed to medium and beat for 5-6 minutes, until light and fluffy. 

Assembly Part 3

Remove cake from the fridge and cover tops and sides with the vanilla frosting. Spread it and present it however you like – I did mine with swirls because I’m not very good at getting my frosting smooth. 

Keep cake in fridge until ready to serve. 

Pin this recipe:
Chocolate Chip Cookie Ultimate Layer Cake

Cookie Dough Cheesecake
Creamy cheesecake made with cream cheese and mascarpone, with delicious chunks of cookie dough
Write a review
Print
Cookie Dough Balls
  1. 115g unsalted butter, softened
  2. 110g brown sugar
  3. 2 tbsp milk
  4. 2 tsp vanilla extract
  5. 140g plain flour (all purpose)
  6. 1/4 tsp salt
  7. 65g mini chocolate chips
Crust
  1. 145g chocolate chip cookies (crunchy, not chewy)
  2. 60g unsalted butter, melted
Cheesecake
  1. 650g full fat cream cheese, room temperature
  2. 100g full fat mascarpone, room temperature
  3. 150g caster sugar (superfine granulated)
  4. 1 tsp vanilla extract
  5. 3 large eggs, room temperature
  6. 80g mini chocolate chips
Instructions
  1. For the cookie dough balls, Beat butter and sugar in a bowl until creamed and combined.
  2. Add milk and vanilla, and beat to combine. Mix in flour and salt until you have soft dough, stir in chocolate chips.
  3. Roll into small balls, about 1 tsp of dough per ball. Place balls on a baking sheet lined with parchment paper and place in the freezer while you make the cheesecake batter.
  4. For the crust, Line the bottom of an 8" pushpan or springform pan with parchment paper and lightly grease the sides.
  5. Put the cookies in a food processor and blitz until you have fine crumbs. Stir in melted butter. Press into the bottom of the prepared cake tin until firmly packed and evenly spread out. Place in fridge.
  6. For the cheesecake, Preheat the oven to 170C/325F.
  7. Put both cheeses, sugar and vanilla in a large bowl (or the bowl of your stand mixer) and beat together on medium until smooth and combined. Add eggs one at a time, beating in between each addition until fully combined. Only beat until combined, you don't want too much air in the batter.
  8. Pour half of the batter into the prepared crust. Take the cookie dough balls out of the freezer and stir into the remaining batter, along with the chocolate chips. Pour into the pan and spread out evenly, it might be a bit lumpy that's okay.
  9. Bake for 60-70 minutes, until the edges are set and the centre is still a bit wet looking. Turn the oven off and crack the door an inch or two, leave the cheesecake in the cooling oven for 1 hour. Remove from oven and cool completely on a wire rack. Remove cooled cheesecake from pan and chill in the fridge for 4 hours or overnight.
Notes
  1. Will keep in fridge for 3-5 days
A Tipsy Giraffe https://www.atipsygiraffe.com/
Chocolate Chip Vanilla Sponge Cake
Light and fluffy vanilla sponge cake with chocolate chips
Write a review
Print
Ingredients
  1. 2 large egg whites, room temperature (save the yolks for the mousse)
  2. 1 whole egg, room temperature
  3. 165ml whole milk
  4. 1 1/4 tsp vanilla extract
  5. 160g plain flour (all purpose)
  6. 1 tbsp corn flour (cornstarch)
  7. 200g caster sugar (superfine granulated)
  8. 1 tbsp baking powder
  9. 1/4t tsp salt
  10. 85g cold butter, cubed
  11. 115g dark chocolate
Instructions
  1. Preheat oven to 180C/350F. Line bottom of an 8" pushpan/springform pan with parchment paper, grease the sides.
  2. In a bowl combine the egg whites, whole egg, 45ml of the milk and vanilla. Set aside.
  3. Put the flour, cornflour, sugar, baking powder and salt into the bowl of your stand mixer, remove 1 tbsp of the mix and place in a small bowl for later. Using the paddle attachment, mix the dry ingredients on low for 30 seconds. Add the butter pieces one at a time, keep mixer on low until you have a crumbly mixture.
  4. Add remaining 120ml milk and mix on low for 5 minutes, scrape down sides and bottom of bowl. Add egg mixture in 3 batches, beat until light and fluffy (about 4-5 minutes).
  5. Put the dark chocolate in a food processor and pulse for 1 minute, until you have finely chopped chocolate with a few larger chunks. Stir the reserved tbsp of flour into the chocolate then stir into the cake batter.
  6. Pour batter into prepared pan and bake for 30-40 minutes, until a skewer comes out clean or with a few moist crumbs (you'll probably get melted chocolate on it, but as long as there's no raw batter you're good). Cool in pan for 5 minutes, then remove and cool completely on wire rack.
Notes
  1. Will keep in an airtight container for 3 days
A Tipsy Giraffe https://www.atipsygiraffe.com/
Vanilla Bean Mousse
Smooth and creamy mousse with an intense vanilla flavour
Write a review
Print
Ingredients
  1. 500ml double cream (heavy cream), divided in half
  2. 1 vanilla pod, seeds scraped out
  3. 1 tsp powdered gelatine, unflavoured
  4. 3 tbsp cold water
  5. 3 large egg yolks
  6. 75g caster sugar (superfine granulated)
Instructions
  1. Measure out 250ml of the cream (leaving the other 250ml in the fridge) and add to a medium saucepan. Add the scraped vanilla bean seeds and the pod itself. Heat on medium low heat until bubbles just start to form around the edge. Remove from heat, cove and leave to steep for 30 minutes.
  2. Prepare an ice bath - fill a large bowl with cold water and ice cubes, have a slightly smaller bowl sitting in the water (without water spilling into top bowl).
  3. Put the 3 tbsp cold water in a small bowl and sprinkle gelatine over, stir. Leave the bloom for 5 minutes.
  4. In a large bowl, whisk together the egg yolks and sugar until well combined and smooth. Remove vanilla pod from cream and gradually pour the warm cream into the egg mix, whisking constantly. Pour back into the saucepan. Cook over a medium low heat, stirring constantly with a wooden spoon until mixture is thickened and coats the back of the spoon - approximately 5 minutes. Do not boil. Remove from the heat and add gelatine mix, whisk to combine.
  5. Pour the custard mix into the top bowl of the ice bath - leave to cool and thicken, whisking occasionally, until room temperature - about 20 minutes. Set aside.
  6. In your stand mixer with the whisk attachment, whisk the remaining cream on a high speed until soft peaks form (peaks will begin to form but they'll barely hold their shape, the tips will fold over almost immediately after lifting whisk out). Gently fold half of the whipped cream into the custard until combined, then fold in other half.
  7. Pour into serving dish dishes (or onto cake for this particular cake recipe), chill in fridge until set - 2-3 hours
Notes
  1. Will keep for 3 days in the fridge.
  2. I strongly urge you to use vanilla bean, but if not use 1 tsp vanilla extract instead
  3. If you'd prefer to use sheet gelatine, replace powdered with 2 sheets - soak in water for 5 minutes, squeeze out excess water and add to the custard in the same place in the recipe.
A Tipsy Giraffe https://www.atipsygiraffe.com/
Cookie Dough Frosting
Creamy cookie dough frosting - tastes just like cookie dough, but without the salmonella
Write a review
Print
Ingredients
  1. 150g brown sugar
  2. 115g unsalted butter, softened
  3. 175g plain flour (all purpose)
  4. 1 tsp vanilla extract
  5. 1/2 tsp salt
  6. 10-12 tbsp milk
  7. 150 mini chocolate chips
Instructions
  1. Beat the sugar and butter on medium speed until smooth.
  2. Add flour, vanilla and salt and mix on low until combined.
  3. Keeping the mixer on lower, add 1 tbsp of milk at a time, add as much milk as you need to get the desired consistency, since you'll be spreading this you'll want it fairly thin (add less milk if you're using it for cupcakes). Stir in chocolate chips.
Adapted from I Am Baker
A Tipsy Giraffe https://www.atipsygiraffe.com/
Whipped Vanilla Bean Frosting
Light, fluffy and delicious whipped frosting
Write a review
Print
Ingredients
  1. 375g unsalted butter, softened and cubed
  2. 475g icing sugar (powdered/confectioners)
  3. 3 tbsp milk
  4. 1 vanilla bean, seeds scraped.
  5. 1 tsp vanilla extract
  6. pinch of salt
Instructions
  1. Put the milk in a small bowl and add the vanilla bean and seeds. Set aside.
  2. Put the butter in your stand mixer bowl and beat with paddle attachment on medium until very pale (almost white) and creamy, about 8 minutes.
  3. Add milk (remove vanilla bean first), icing sugar, vanilla extract and salt and mix on low for 1 minute. Increase speed to medium and beat for 5-6 minutes, until light and fluffy.
Notes
  1. Use immediately, it won't keep well
A Tipsy Giraffe https://www.atipsygiraffe.com/

 moreposts

Apricot Cheesecake with Amaretto Caramel

Apricot Cheesecake with Amaretto Caramel

Blackberry and Elderflower Entremets

Blackberry and Elderflower Entremets

Iran Flag Vanilla Cake w/ Strawberries and Kiwi

Iran Flag Vanilla Cake w/ Strawberries and Kiwi

Sharing with…

Fiesta FridayCreate It Thursday, Cook It! Craft It! Share It!, Foodie FriDIY, Super Saturday, Show Me Saturday, Scraptastic SaturdayMotivation Monday, Frugal Crafty Home, Hit Me With Your Best ShotSweet and Savoury SundayProject ParadeInspire Me WednesdayBake of the Week


Chocolate Banana Ice Cream

Chocolate Banana Ice Cream

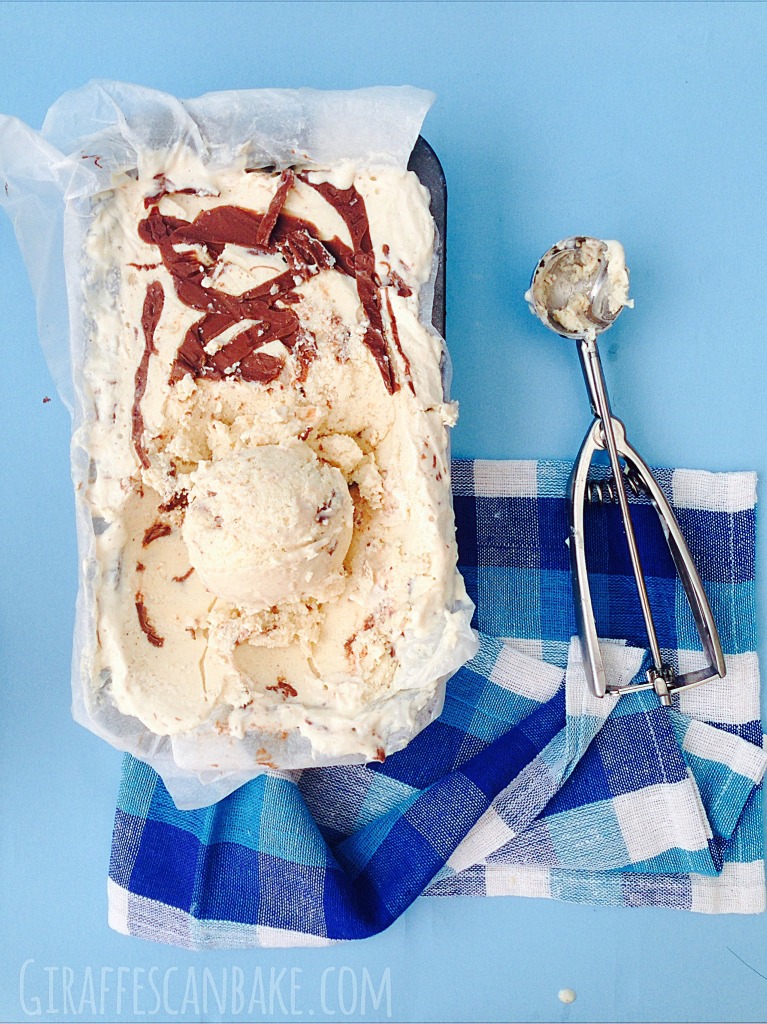
What’s that? Winter you say? Sounds like the perfect time for ice cream to me! I’ve said it before and I’ll say it again – it’s never too cold for ice cream. I know lots of you are covered in snow right now, and I bet ice cream would make you feel better about that! Don’t believe me? Try this super chocolatey ice cream full of banana sweetness and I’ll wait for you to tell me I’m right, I won’t even tell you I told you so – I’m nice like that!

Chocolate Banana Ice Cream

I’m on a bit of banana kick at the moment. I keep buying them and just waiting for them to go over ripe in the fruit bowl, so I can make something yummy with them! With this batch of bananas I was torn between two ideas, so I did the only thing I could – made one of them and bought more bananas so I could make the other thing too! This yummy chocolate banana ice cream was the result of the first batch – creamy, chocolatey, sweet and oh so delicious! 

Chocolate Banana Ice Cream

Now I know you’ve probably heard about that healthy banana ice cream that is pretty much just mashed frozen bananas, but you’re not going to find any of that kind of healthiness here I’m afraid – this is proper ice cream, full of real cream! It still has bananas in though, so it’s entirely bad for you right? All that potassium totally negates all the fat and sugar I’m sure of it! Come to think of it, with all that potassium this ice cream is sure to be a hangover buster. See, I’m looking out for you guys 😉

Chocolate Banana Ice Cream

I originally thought about just banana ice cream, but then I remembered everything is made better by chocolate so I had to add it! I use both cocoa powder and melted chocolate in this ice cream, to really give it that chocolate boost. It doesn’t over power the banana though, both flavours punch through beautifully alone while also complimenting each other! I put a little cinnamon in there too a) because I’m me and b) cinnamon really does compliment banana so nicely. You will need an ice cream maker for this recipe, but it’s a worthwhile investment if you love ice cream as much as me! 

Chocolate Banana Ice Cream

So let’s do a headcount shall we? Banana? Check! Chocolate? Check! Real cream? Check! Deliciousness? Double check! Yep, this ice cream really does have it all! You won’t be sorry you made this, and neither will your family/friends/random people who show up at your house to eat your ice cream. Serve it up with some fresh banana slices or even on top of a nice warm pie, and you’ll have one awesome dessert! Since it’s homemade it won’t last as long as your store bought ice cream, but trust me when I tell you it won’t have a chance to go bad – you’ll be lucky if it lasts overnight! 

Chocolate Banana Ice Cream


Chocolate Banana Ice Cream

I’d love to see what you guys are up to on social media, You can find me on Twitter,Instagram,Pinterest and Facebook

If you liked this post, why not enter your email address into the subscription box on my side bar to get my future posts directly into your inbox!

Chocolate Banana Ice Cream
Delicious chocolate banana ice cream, simple to make and oh so worth it
Write a review
Print
Ingredients
  1. 4 Bananas, very ripe
  2. 1/2 cup brown sugar
  3. 60g chocolate finely chopped
  4. 1 cup double cream
  5. 2/3 cup milk
  6. 1/4 cup cocoa powder
  7. Pinch of salt
  8. 1/4 tsp ground cinnamon
  9. 2 egg yolks
Instructions
  1. Put the bananas and 1/8 cup of the sugar in a blender, and blend to combine. Only do a couple pulses if you'd like little chunks of bananas in your ice cream like me, otherwise blend until smooth. Set aside.
  2. Put the chocolate in a medium bowl. Heat 3/4 cup the cream until bubbles just start to appear and pour over chocolate. Leave to stand for 1 minute and then stir until smooth.
  3. Pour the cream and chocolate mixture back into the pan with the milk, rest of the sugar, cocoa, salt and cinnamon. Heat on medium, stirring occasionally, until sugar is all dissolved and it just starts to steam. Remove from heat
  4. Whisk egg yolks in a bowl. Ladle 1/4 cup of the cream mixture into the bowl with the eggs and whisk in. Repeat with 2 more 1/4 cups of the mixture - until egg yolks are warm to touch.
  5. Pour egg mixture into the pan and return to a medium heat. Stir constantly until mixture thickens. It's ready when it coats the back of the spoon - it will be about 80C/170F on a candy thermometer. Do not boil!
  6. Remove from heat and stir in the rest of the cream and the banana mix. Transfer to a bowl.
  7. Fill a bowl slightly larger than the bowl your custard is in with ice water, place the custard bowl in the ice water. Cool in ice bath for 20 minutes, until room temperature (make sure no water can spill into the custard). Transfer to the fridge and chill for 3 hours or overnight.
  8. Freeze the custard in your ice cream maker according to your ice cream maker's instructions.
  9. Once it reaches a soft serve consistency, transfer to your storage container and place in freezer overnight.
  10. Leave at room temperature for at least 10 minutes before scooping and serving
Notes
  1. Keep in airtight container for up to 2 weeks in the freezer
  2. I used dark chocolate, but milk chocolate will be good too - whichever you prefer.
  3. Recipe makes about 1 quart (950ml)
A Tipsy Giraffe https://www.atipsygiraffe.com/
moreposts

Hazelnut Gelato

Hazelnut Gelato

Pumpkin Pie Ice Cream

No Churn Pumpkin Pie Ice Cream

Chocolate Banana Muffins

Chocolate Banana Muffins

Sharing with… 

Fiesta FridayHit Me With Your Best ShotInspire Me Wednesday,Create It Thursday, Cook It! Craft It! Share It!Foodie FriDIYSuper SaturdayShow Me SaturdayScraptastic Saturday, Motivation MondayFrugal Crafty Home,

Chocolate and Raspberry Vodka Tonic

Chocolate Raspberry Vodka Tonic

Happy 1st Birthday to Fiesta Friday!!! 52 weeks of an awesome virtual pot luck party, the only place to be every Friday! And after 52 weeks it’s only getting better. If you haven’t partied with us before, today is the day – because we’re having a party within a party! And even better than that, it’s a two week long party. This week it’s happy hour time, so there’s going to be plenty of appetizers, finger foods and of course cocktails! Next week the party will continue with main dishes and desserts! So come celebrate with us, whether it’s your 1st Fiesta Friday or your 52nd, you’ll be welcomed with open arms and you’ll have a great time,   I promise. Our fab co hosts for part 1 of the party are Hilda and Julianna.  Join up with the party here 

Chocolate Raspberry Vodka Tonic

I am bringing this awesome cocktail to the First Fiesta Friday Anniversary Block Party – because what’s a party without a cocktail or 5! When I brainstorming on what to make for the party I knew it needed to be something sweet, it’s what I do best after all. And I think our wonderful host, Angie, might appreciate how I happened upon these ingredients as I know she impulse buys random things in the store because she *might* find a use for them, just like I do – that’s how I got the two main ingredients for this cocktail! There’s a small international section in the mini Tesco by my house and I also browse it to see if there’s anything fun looking, and I found this bottle of raspberry syrup, I think it’s Polish but I’m not 100% sure, I picked it up because I thought it looked cool and I was sure I’d find a use for it – cue it sitting in my cupboard for 6 months unopened! Then when I was in Atlanta over Christmas, I went to the liquor store to pick up some bottles of wine and at the checkout they had little bottles of flavoured vodka, as soon as I saw the chocolate vodka I picked up one – chocolate and vodka, what’s not to love?! And again my rationalisation was “I’m sure I can find a use for it!” 

Chocolate Raspberry Vodka Tonic

When I thought about cocktails I could make from the chocolate vodka and raspberry my mind immediately went to a cream based cocktail, it seemed to make the most sense. But the inspiration this chocolate and raspberry vodka tonic came when I was enjoying my regular vodka tonic. Vodka tonic with a lime wedge is my favourite drink but it has to be good quality vodka, and it has to be polish. My favourite is Belvedere by far, I always pick up a bottle at duty free! A chocolate vodka tonic definitely sounded like a good idea to me, especially combined with raspberry syrup and with the addition of a little fresh lime juice and you have every flavour profile a cocktail needs – sweet, bitter and sour! It’s a simple cocktail to put together, but it will definitely impress your friends. And it’s perfect for a big party like this! 

Chocolate Raspberry Vodka Tonic

I’m no mixologist and cocktails definitely aren’t my area of any kind of expertise, but I knew if I got the right levels of sweetness from the syrup and vodka, the bitter edge to the tonic would make for a delicious cocktail. You don’t even need any fancy cocktail wear to make it, no shaker needed. You will want something mix it up, but even a spoon will do. Since this is a stirred drink, the amount of ice you use isn’t too important as it’s not used to dilute the drink – you just need enough to keep it nice and cold. 

Chocolate Raspberry Vodka Tonic

I’d never heard of this brand of vodka before and while it’s no Belvedere it was very tasty, if you can get your hands on some chocolate vodka I would definitely recommend it trying it! It has a bit of chocolate sauce taste to it which blended really nicely with the raspberry syrup. If you can’t get your hands on chocolate vodka right now, I would definitely recommend trying this with regular vodka I’m going to be adding raspberry syrup to my regular vodka tonics much more often – but please use good vodka, drinks are just like anything else, the better quality your ingredient the better it will taste! 

Chocolate Raspberry Vodka Tonic by Giraffes Can Bake


This drink is not only great for this fab party, but with that beautiful pink colour and the chocolate theme it’ll be perfect to serve on Valentine’s Day – whether you’re spending it with a significant other or having drinks with your single friends! I’m certainly going to pour one for myself on February 14th! 

Chocolate Raspberry Vodka Tonic

So, get your party shoes on and grab a cocktail, there’s lots to see and taste! I can’t wait to see what everyone else has brought to the party, cheers! 

I’d love to see what you guys are up to on social media, You can find me on Twitter, Instagram,Pinterest and Facebook

If you liked this post, why not enter your email address into the subscription box on my side bar to get my future posts directly into your inbox!

Chocolate Raspberry Vodka Tonic


Chocolate and Raspberry Vodka Tonic
A delicious cocktail made with chocolate flavoured vodka, perfect for Valentine's Day and any party!
Write a review
Print
Ingredients
  1. Ice
  2. 25ml Chocolate Vodka
  3. 25ml Raspberry Syrup
  4. Tonic Water
  5. 2 Lime Wedges
  6. Fresh Raspberries (optional)
Instructions
  1. Add ice to a tall glass, filling halfway full
  2. Pour over vodka and syrup, fill up with tonic water.
  3. Squeeze lime wedges into glass before dropping them in glass
  4. Garnish with fresh raspberries if desired, serve with stirrer to mix drink.
Notes
  1. If you don't have stirrers, be sure to stir drink before serving
A Tipsy Giraffe https://www.atipsygiraffe.com/

Sharing with… 

Fiesta FridaySuper SaturdayShow Me SaturdayScraptastic Saturday, Bewitchin’ ProjectsHit Me With Your Best Shot, Inspire Me Wednesday, Create It Thursday, Cook It! Craft It! Share It!

Apricot Cheesecake with Amaretto Caramel

Apricot Cheesecake with Amaretto Caramel

I finally started baking again and oh boy did I go hard my first time back! What better way to get my mojo back by baking this wonderfully creamy, thick apricot cheesecake, topped with a delicious amaretto spiked caramel! I think the universe was just waiting for something truly awesome to come into my head before I could bake again, or maybe subconsciously I felt I had to go really big to make up for my absence in the kitchen. Either way, I was so happy with the results – this cheesecake disappeared pretty quickly in my house, despite the size of it! 

Apricot Cheesecake with Amaretto Caramel

The inspiration came about when I picked up some apricots from the Indian supermarket by me, I like apricots a lot but I’ve never really done much with them so I decided to pick up a few to see if I could get them to spark my imagination. And they did! Cheesecake is one of my absolutely favourite desserts, if not my actual favourite, and I really don’t make them often enough – so the apricots were destined for a cheesecake! I can’t really say where the inspiration for the amaretto caramel came from, but I’ve been wanting to bake with amaretto for a while now (hopefully one day I’ll work up the courage to make some amaertti cookies!) and almond and apricot are a good match. And it really does work so well, the sweet almond liquor caramel combined with the creamy, tart cheesecake is just a match made in heaven. So good! The caramel is the sauce from my Brown Sugar & Pecan Caramel Pound Cake, it’s thick and delicious and perfect for topping a cheesecake – it sets but doesn’t get hard so the sauce stays on top of your slice but you’re not gonna break your teeth! The very bottom of the sauce layer stayed runny and gooey though, I’m not sure why but I loved it – a little bit of goo is very good in my books!

Apricot Cheesecake with Amaretto Caramel

Now, let’s talk crust! I love the crust of a cheesecake, it might even be my favourite part. I’m personally offended by crustless cheesecakes to be quite honest, if there’s no crust I don’t want to know about it! And my love of cheesecake crusts is why this cake as so much of it – it has a thin crust base and then a thick crust border all the way up the sides, which is the perfect combination in my books. If you don’t like joy, then feel free to limit your crust to the base 😉 The crust on this cheesecake is a digestive biscuit base with some almond flour thrown in for a subtle almondy kick. Don’t worry if you can’t get digestives easily where you live, graham crackers are a good substitute. So now we have creamy, tart cheesecake, sweet amaretto caramel and a crunchy digestive crust – if this isn’t what dreams are made of then I don’t know what is! 

Apricot Cheesecake with Amaretto Caramel

Did I mention yet that the apricots are roasted before they go in the cheesecake? Yep! With a little brown sugar to caramelise them just a little and also to reduce the moisture just a little. You don’t have to worry about the liquid in the fruit too much for this particular cheesecake because it doesn’t have any cream in it, so a little extra liquid won’t make it sloppy. This is a baked cheesecake too, I’ve had and seen some wonderful no bake cheesecakes but, for me, a real cheesecake is always baked! You just can’t beat the texture and taste you get from a baked cheesecake. It does take a bit of time for the cheesecake to be ready to eat, but it’s worth it. Plus most of the time is baking, cooling and chilling, the actual hands on time isn’t very long and it’s easy to do. Trust me, you can do this! And you’re going to want to! Apricots aren’t in season in the northern hemisphere right now (mine were imported), so you can use canned apricots if you can’t find any fresh ones – just make sure to drain them really well before roasting. Another important note if you’re looking to make this cheesecake but you don’t want any alcohol in it – just swap out the amaretto for almond extract, I’ll include a note on that in the recipe. 

Apricot Cheesecake with Amaretto Caramel

I’d love to see what you guys are up toon social media, You can find me onTwitter, Instagram, Pinterest and Facebook

If you liked this post, why not enter your email address into the subscription box on my side bar to get my future posts directly into your inbox!


Apricot Cheesecake with Amaretto Caramel
A delicious creamy and thick apricot cheesecake with an amaretto spiked caramel topping and a digestive crust.
Write a review
Print
For the crust
  1. 250g digestive biscuits
  2. 50g ground almonds
  3. 1 tbsp brown sugar
  4. 1/2 tsp ground cinnamon
  5. 150g unsalted butter, melted
For the cheesecake
  1. 8 apricots
  2. 1 tbsp brown sugar
  3. 1kg full fat cream cheese, room temperature
  4. 230g caster sugar (super fine white sugar)
  5. 1 tsp vanilla extract
  6. 4 large eggs, room temperature
For the caramel
  1. 1 can sweetened condensed milk (397g can)
  2. 180g brown sugar
  3. 30g unsalted butter
  4. 3 tbsp amaretto
Instructions
  1. Preheat the oven to 200C/400F
  2. Halve the apricots and remove the stone. Lay on a baking tray, cut side up and sprinkle with 1 tbsp brown sugar. Roast in oven for 10 minutes. Leave to cool for 5 minutes, put in blender and blend until smooth. Leave to cool completely.
  3. Line the base of a 9"/23cm push bottom or springform cake tin with parchment paper, then grease the edges.
  4. To make the base, add the digestives, almond flour, sugar and cinnamon to a food processor and blitz until you have fine crumbs. Add the butter a little at time and stir in until the mixture can be easily clumped together - you might not need all the butter.
  5. Press the mixture into the base of the cake tin and around the edges - use the side of a glass and roll around the sides of the tin to press in the edges easily. Place in the fridge to chill for 15 minutes.
  6. Preheat the oven to 170C/325F.
  7. Add the cream cheese, sugar and vanilla to the bowl of your stand mixer (or in a large bowl if you're using a hand held) and beat on medium until smooth and fluffy, about 90 seconds.
  8. Add the apricot puree and beat in gently, on a low speed.
  9. Add the eggs one at time, beating on low between each addition.
  10. Pour the mixture into the prepared crust and baked for 1 hour 15 minutes. The cheesecake is done when the edges look dull and set. It will still have quite a wobble to it, that's okay - it carries on baking as it cools and you don't want to over bake it. Turn the oven off and open the door a couple of inches, leave the cheesecake to cool in the off oven for 1 hour. Transfer to a wire rack and cool completely.
  11. To make the caramel, put the condensed milk and sugar in a medium saucepan and bring to a boil over a medium high heat, whisking constantly. Reduce heat and simmer for 8 minutes. Remove from heat and whisk in butter and amaretto. Leave to cool for 10 minutes.
  12. Remove the cooled cheesecake from the pan and place on plate. Pour caramel over the top and spread out evenly. Chill cheesecake in fridge for a minimum of 4 hours before serving.
Notes
  1. If you don't have digestives, graham crackers are a good substitute
  2. Swap the 3 tbsp of amaretto for 1 tsp almond extract for an alcohol free version.
  3. An over baked cheesecake will crack along the top as it cools and there are ways to help stop this happening, however I don't personally bother with most of them unless it's important for the top to be smooth. Since there is a topping on this cheesecake it doesn't matter if there are cracks - however if you'd like to avoid them you can bake the cheesecake in a bath - place the tin in a roasting dish filled with about an inch of water before placing in the oven. If using a spring form or loose bottomed pan, wrap the outside of the pan in foil before putting in the bath.
A Tipsy Giraffe https://www.atipsygiraffe.com/
moreposts

Captain America Cheesecake

Captain America Cheesecake

strawberry margarita cheesecake bars

Strawberry Margarita Cheesecake Bars

Cheesecake Swirl Brownies

Cheesecake Swirl Brownies

Sharing with…

Fiesta Friday, Inspire Me WednesdayCreate It ThursdayCook It! Craft It! Share It!, My 2 Favorite Things on Thursday, Creative WaysFoodie FriDIYSuper Saturday, Show Me Saturday, Scraptastic SaturdayBewitchin’ ProjectsHit Me With Your Best Shot, Project Parade, Bake of the Week