"> Giraffes Can Bake - A Tipsy Giraffe - Page 39

Piñata Cake

Yummy cake with a hidden surprise!

Image

It’s been a while since my last blog post, I’d love to tell you it’s because I’ve been super busy but really I’m just lazy. I’m currently in Atlanta celebrating the holiday season. I celebrated my first Thanskgiving this year, it was a lot of fun, you can’t beat a holiday where all you do is eat! I made my Sweet Potato & Cider Cupcakes with Marshmallow Frosting for the occasion. Anyway, back to the task at hand.

My nephew’s 6th birthday was coming up so naturally I planned to make him a cake. He loves Mario so I went with a Mario world themed base and a coin block on top. As it’s a coin block there has to be coins inside, and so I made my first piñata cake! It’s a simple thing to do but looks really impressive when you cut into the cake. Kids will love it too of course. In this blog post I’ll show the method I used, so there are no recipes in this post. I plan to share my Chocolate Mojito Swiss Roll recipe soon (I just need to go through it again as I didn’t write it down the first time, oops) so look out for that, it’s a good one!

This method will work with most cakes. This one is a cube of course, but it’ll work with a standard round cake too (or any shape if you’re committed enough!). The first thing to do is bake your cake layers, you want the cake to be tall enough to be able to have a good sized centre for the sweets/chocolates, my cake had three layers so I’ll be basing this tutorial off of that. Once your layers are baked and cooled, cut a circle out of the centre of one layer and then circles out of half the other two layers. Feel free to eat the cut offs, you deserve it!

Image

For the centre layer, you want the hole to go all the way through

Image

For the top and bottom layer, you don’t want the hole to go all the way through

Now it’s time to fill and build it. Frost the bottom layer, being careful to avoid the hole cut out, then place the centre layer on top

Image

Image

Fill the whole with your chosen sweets. Mine was filled with chocolate coins and smarties.

Image

Frost/fill that top layer, again avoiding the hole and top up with more sweets

Image

Add the top layer and you have your base for your fancy piñata cake.

Image

It looks like just a normal cake, but you know the secret inside!

Now crumb coat and frost/cover your cake as you would normally. Present your cake and accept all the praise you get for how impressive and clever you are!

Image

The finished cake! As you can see, my cake decorating skills still need some work but I’m getting better!

Image

The birthday boy and his cake!

Of course with a piñata you’re supposed to whack it with a stick to get the sweets inside. I wouldn’t recommend that with a cake, unless you cover the room with plastic first haha!

Pumpkin Pecan Pie

Image

Happy Hallowe’en everybody! I won’t lie to you, I’m not Hallowe’en’s biggest fan. But I do love pumpkin and spices and pecans and dressing up (I dressed up as a sickly person in her pjs this year). I have never made pumpkin pie before, I’ve never even eaten pumpkin pie before! But I love everything that goes into it so I figured why not be festive! I decided to add a pecan topping because I think I’ve spent too much time in Atlanta). The pie itself turned out great, I mean I’ve never eaten pumpkin pie so maybe I got it completely wrong, but it was scrummy so either way I’m happy. I’m a great lover of autumn spices, I associate them more with Christmas (see below re: lack of autumn holidays here) but I’m a firm believer that you should bake with cinnamon, nutmeg and allspice all year round.

Image

I think this pumpkin pie post needs a little disclaimer before we continue – this pie doesn’t actually contain any pumpkin. I made this with butternut squash. Hallowe’en isn’t that big of a holiday in the UK and we obviously don’t have thanksgiving, with those being the two big pumpkin holidays we don’t have a plethora of choice when it comes to pumpkins. Just before halloween you can buy pumpkins for carving, but I wouldn’t recommend baking with them. But fun fact: a lot of canned pumpkin is actually butternut squash anyway (they use butternut squash as it’s less stringy, sweeter and a better colour) so I’m not really cheating here! Maybe I should have called it Butternut Squash Pie, but that just doesn’t sound as festive!

Image

Paul Hollywood would not be impressed with my soggy bottom (I over greased the pan, oops)

I have another small confession, I made two pies. The first pie I used a ready made pie crust because I didn’t want to bother making my own pastry (did I mention I was a sickly pj lady today?) and I don’t actually own a pie dish. However it was much shallower than I anticipated and all the pumpkin filling spilled out and I was left with an accidental (but tasty) pecan pie. My mum enjoyed the accidental pecan pie so it wasn’t a complete loss!

Image

Who said the pie filling actually has to be in the pie crust anyway???

I couldn’t bear to just leave it at that so I decided to suck it up and make my own pastry (admittedly this decision was after a failed attempt to buy ready made shortcrust at Tesco), after all shortcrust pastry is pretty much the easiest pastry to make. I will include the recipe for that, but don’t feel bad if you use ready made, I would have if I could have. My philosophy is life’s too short to make your own pastry!

Image

I know you’re jealous of my giraffe print knives

Time to get down to business then!

Ingredients

For the Sweet Shortcrust Pastry: 

  • 225g  plain flour (plus extra for dusting)
  • 110g butter
  • 80g caster sugar
  • 1 large egg
  • 1/2 – 1  tbsp milk
  • pinch of ground cinnamon (optional – you can substitute with other flavours, but try not to over power with flavour)

For the Pumpkin Filling: 

  • 500g butternut squash, cooked and pureed
  • 1 (397g) tin condensed milk
  • 2 eggs, beaten
  • 175g dark brown soft sugar
  • 1 teaspoon ground cinnamon
  • 1/2 teaspoon ground ginger
  • 1/2 teaspoon ground nutmeg
  • 1/3 teaspoon ground allspice
  • 1/2 teaspoon salt

For the Pecan Topping:

  • 220g golden syrup
  • 115g caster sugar
  • 2 large eggs
  • 3 tablespoons butter, melted
  • 1/2 teaspoon vanilla extract
  • 200g pecan halves

Method

For the pastry:

Line the bottom of an 8inch pie dish (or sandwich cake tin if you’re improvising like me!) with greaseproof paper and very lightly grease sides of dish.

Put the flour and butter into a bowl and rub the butter into flour until you have fine crumb mixture. Stir in the sugar and cinnamon (if using). Mix in the egg and enough milk to form a soft dough. Try not to work the dough too much as you don’t want to melt the butter. Wrap in cling film and place in fridge to chill for at least 15-30 minutes.

Dust work surface with flour and roll out pastry to a 1/2cm thickness. Transfer to pie dish and lightly press into the bottom and into edges. If you tear the pastry, just fix holes with pastry cut offs. Set aside.

Image

Make shift pie dish

For the pie filling:

Preheat oven to 200C/ 400F/ Gas mark 6.

Line a baking tray with foil and light oil. Halve butternut squash length wise and scoop out the seeds and stringy bits and remove stem. Place squash halves cut side down on baking tray and pour 50ml water into tray. Loosely cover with foil and bake in oven for 50 minutes or until flesh is tender.

Image

Remove from oven and leave to cool. Scoop flesh from peel and put into food mixer, blend until you have a smooth puree. Measure out 500g and set aside (if you have any remaining squash, reserve excess for another use like yummy mash potato).

Image

Look at that bright orange, you’d never get that naturally with a pumpkin!

In a large bowl and hand mixer, beat the squash with condensed milk, eggs, sugar, spices and salt. Pour into the unbaked pastry case, leaving a space for the pecan topping.

For the pecan topping:

Combine the golden syrup, sugar, eggs, melted butter and vanilla extract in a bowl and stir in the pecans. Pour on top of pumpkin layer.

Bake in the oven at 200C/400F/Gas 6 for 50 minutes or until a knife inserted comes out clean.

Leave to cool in dish for 10 minutes and then and turn out onto wire rack, leave to cool completely.

Serve with freshly whipped cream, yum!

Image

I used a number of recipes from the internet to come up with this recipe. Those that I still have the links for are here and here

Profiteroles with Warm Chocolate Sauce

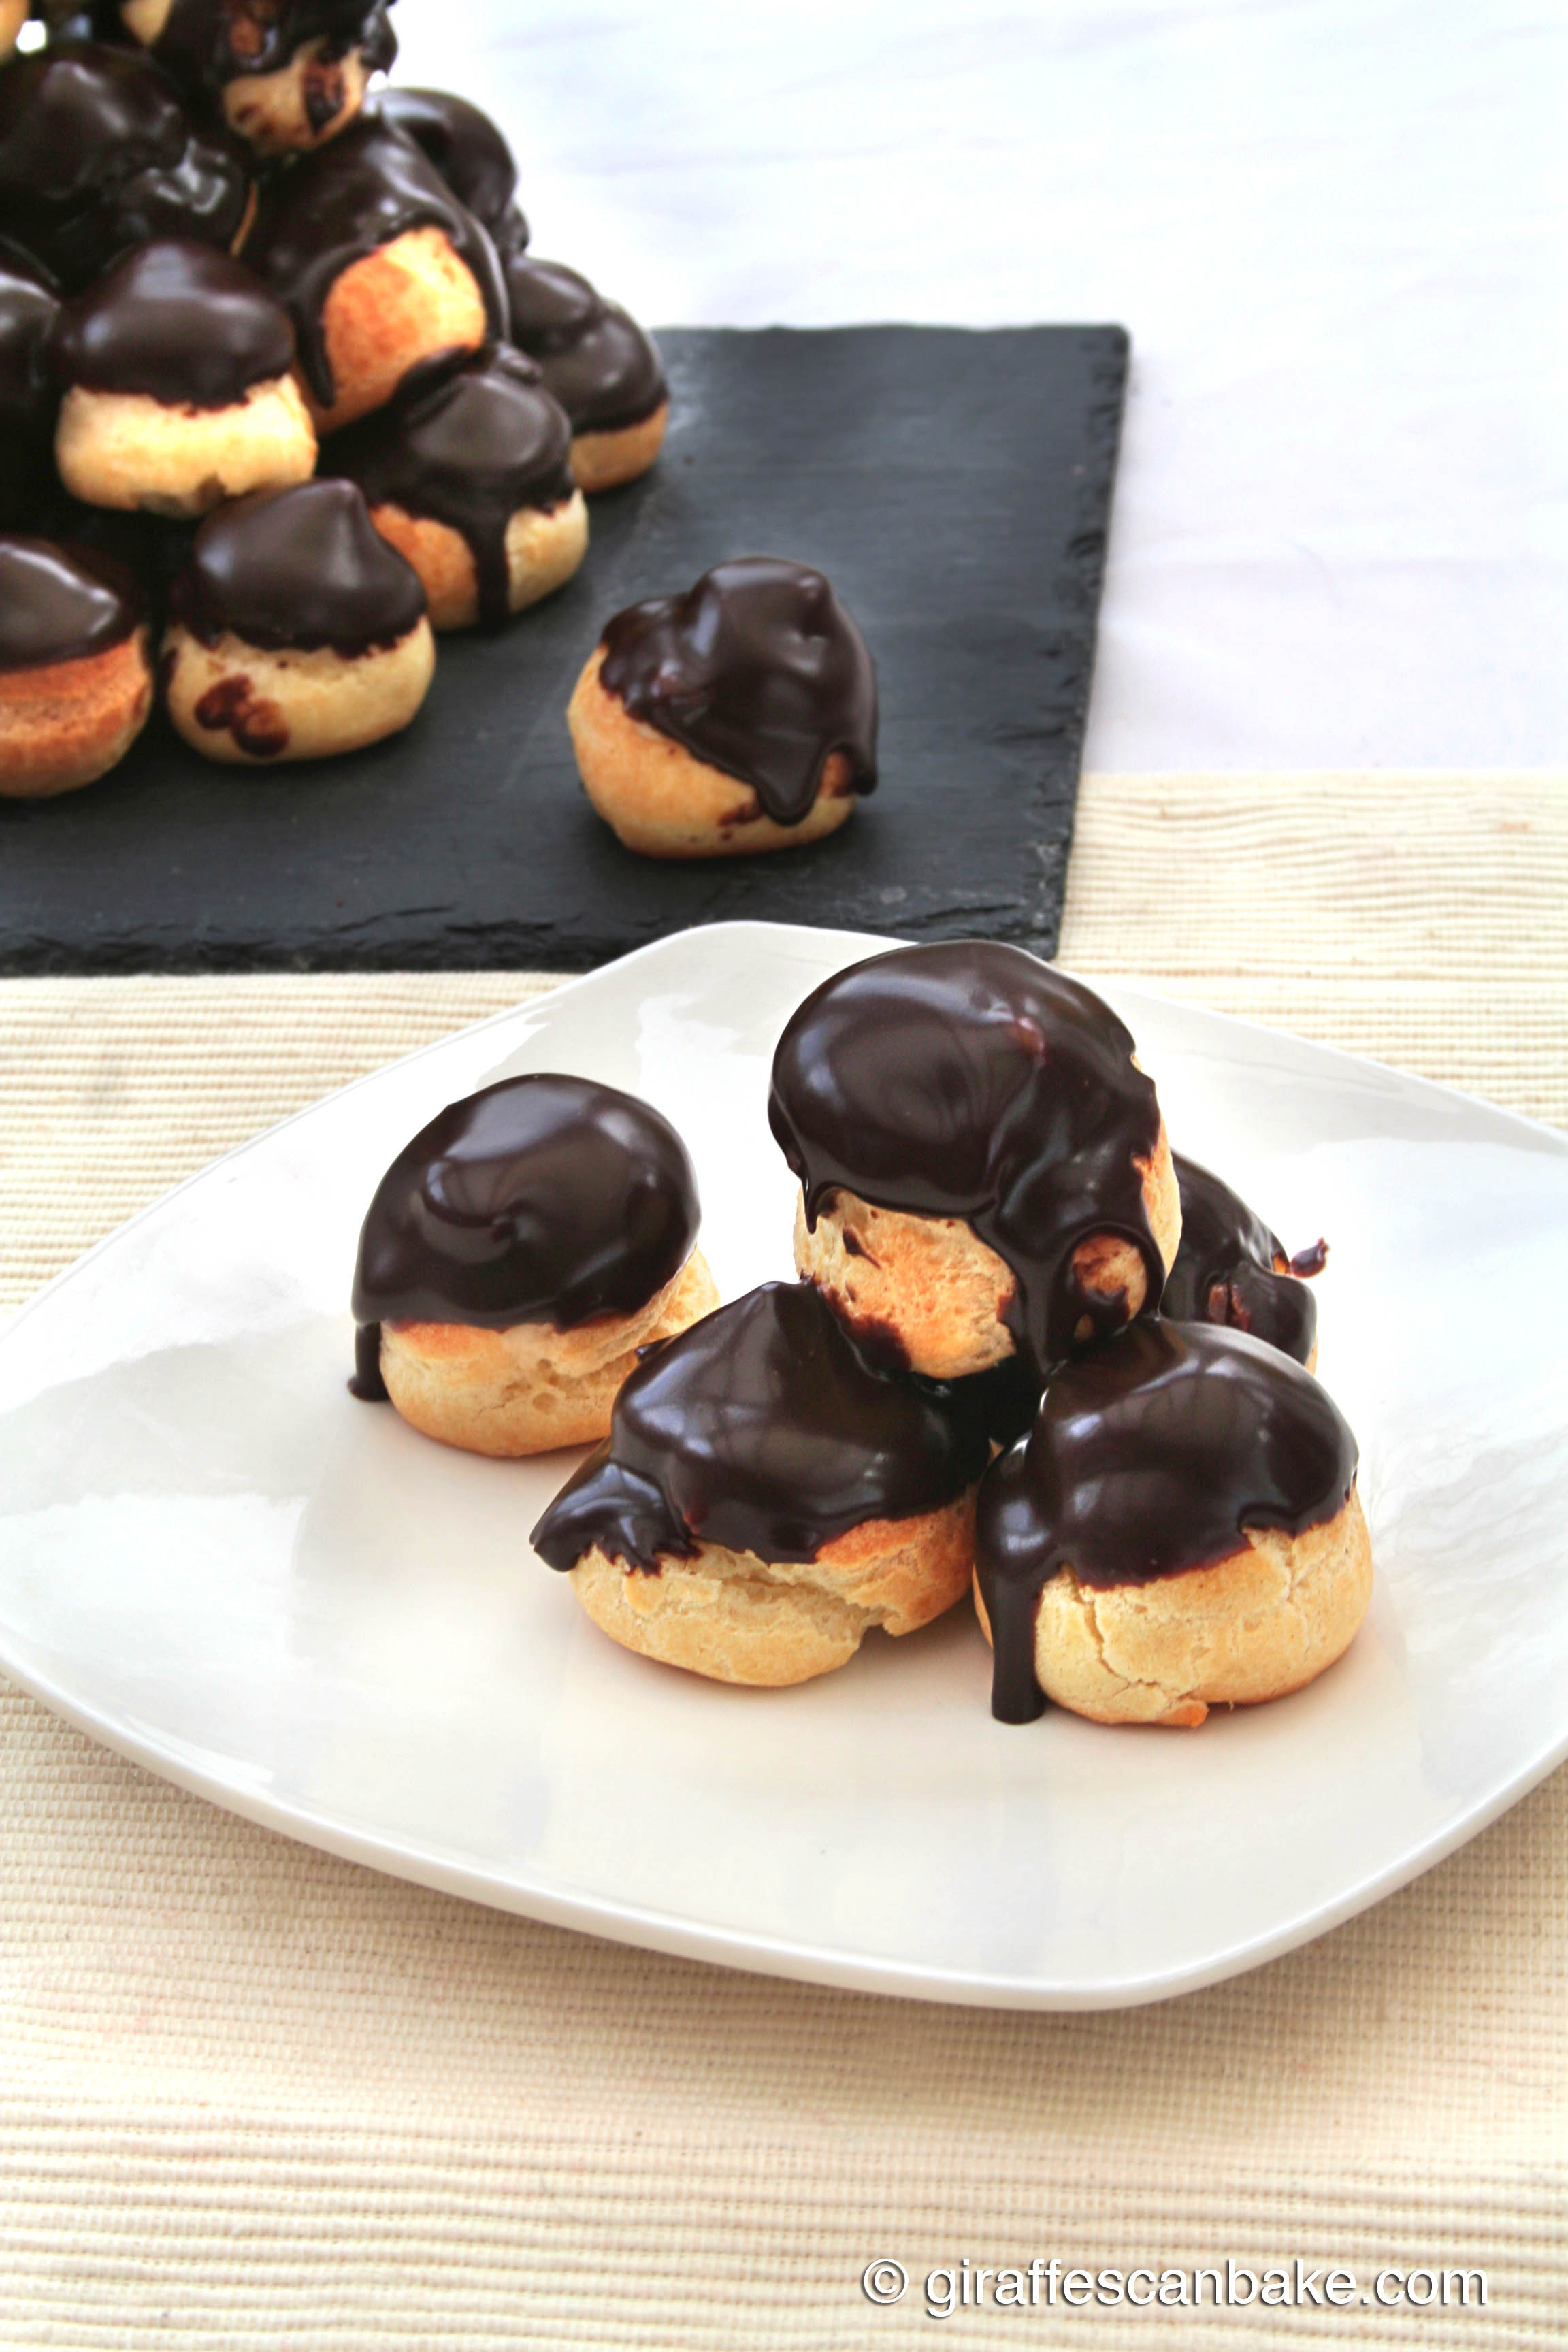
Light and airy choux pastry buns filled with crème pâtissière and smothered in warm chocolate sauce. Simple enough for a treat after a family dinner, elegant enough for a dinner party dessert! 

profiteroles with warm chocolate sauce


profiteroles with warm chocolate sauce

When I think profiteroles I think dessert at my nan’s house, so they bring up lots of good childhood memories. Even without the attached memories, I LOVE profiteroles. But for some reason it’s taken me until the ripe old age of 27 to try making them myself. I’m not a big pastry maker, I’m firmly in the “you don’t need to make your own pastry” cop out camp. Choux pastry is a different matter though, I can’t store buy that (I don’t think I’d want to either). I was a little intimated by the idea but after being assured it was a lot easier than it looked I took the jump!

profiteroles with warm chocolate sauce

I used Gordon Ramsay’s profiterole recipe because he gives me heart eyes and when I stumbled across his recipe, how could I not give that one a go? You can find his original recipe here, I however didn’t fill mine with chantilly cream because creme patissiere is always better let’s be honest. When I told my mum I was using creme patissiere (which is literally pastry cream in English btw) instead of fresh cream she was disappointed, but after trying my profiteroles she saw the light! And the warm chocolate sauce is beautifully rich, I recommend making a big batch up and using it for everything (I still have some I’m trying to find an excuse to use!). Gordon’s recipe wasn’t too helpful with baking time either, it wasn’t until my 3rd tray that I got them to bake properly all the way through!

profiteroles with warm chocolate sauce

This bake was actually part of my belated Great British Bake Off challenge for pastry week. Yes, it’s taken me this long to make this post! The Great British Bake Off is over now and although my favourite didn’t win, I enjoyed this series a lot, it’s around this time I’m tempted to apply (by the time the next series comes around I’m always glad I didn’t!) The profiteroles were my last bake along, it was a very short lived challenge, although I am tempted to give Charlotte Royale a go after French week!

profiteroles with warm chocolate sauce

Let’s get down to business shall we?

profiteroles with warm chocolate sauce

Ingredients

For the choux pastry:

  • 125ml milk
  • 200ml cold water
  • 150g plain flour
  • 1 tsp golden caster sugar
  • ½ tsp salt
  • 100g unsalted butter
  • 4 medium eggs, lightly beaten

For the creme patissiere:

  • 500ml whole milk
  • 1 tsp vanilla extract
  • 6 medium egg yolks
  • 75g caster sugar, plus extra for dusting
  • 25g plain flour
  • 20g cornflour

For the warm chocolate sauce:

  • 200g good quality dark chocolate (about 70% cocoa solids)
  • 30g unsalted butter
  • 3 tbsp clear honey
  • 125ml whole milk

Method

Preheat the oven to 200C/390F/Gas 6. A properly preheated oven is very important to get your pastry to bake properly. Line a baking sheet with greaseproof paper.

To make the choux buns, sift the flour into a bowl and set aside. Pour the milk, water, salt and sugar into a pan and gently heat on low, once the sugar and salt has all dissolved add the butter. Once all the butter has melted, bring the mixture to a rolling boil and remove from heat. Pour in the flour and beat with a wooden spoon, when the mixture starts to come away from the side of the pan, stop beating and tip onto a plate cool. Your mixture will probably look a bit like mashed potato at this point!

Once it’s cool (make sure it’s completely cool or your mixture will be too runny) return the mixture to the pan and gradually beat in the eggs a little at time, mixing well between each addition until you have a smooth paste.

Spoon the pastry into a piping bag fitted with a large plain nozzle. If you don’t have any nozzles, buy some they’ll come in handy, but for not you can just snip off the end of the bag to get a circle hole, you need the hole to be about 1.5cm in diameter. Pipe a small blob of pastry under each corner of the greaseproof paper on your baking sheet, this will help keep it in place while you pipe the buns. Pipe balls onto the baking sheet, about 3cm in diameter, spaced well apart. Level the tops slightly with the tip of your finger, wet your finger a little first to stop the pastry sticking to you! Bake at 200C/390F/Gas 6 for 10 minutes, then reduce the temperature to 175C/350F/Gas 4 and bake for 20 more minutes until well risen and golden brown. Remove from the oven and poke a small hole in each bun (this will let any steam out and stop your buns going soggy), transfer to wire rack and leave to cool completely.

To make the creme patissiere, put the milk and vanilla in a heavy bottomed saucepan and bring to the boil (make sure you have a large pan, milk increases A LOT in size when it boils) and simmer very gently for about 5 minutes. Remove from heat and let cool for 30 seconds.

Meanwhile, whisk together the egg yolks and caster sugar until they turn a pale yellow. Then whisk in both flours. Pour on the milk, whisking constantly, then pour back into the pan. Make sure you always pour the hot milk/cream into cold eggs when making pastry creams, if you do it the other way you’re in danger of scrambling the eggs!

Whisking constantly to avoid lumps, bring back to the boil over a medium heat and cook for 1 minute. Pour the mixture into a bowl. Sprinkle the surface with a light dusting of caster sugar to prevent a skin from forming and leave to cool completely.

Spoon the crem pat into a piping bag fitted with a small nozzle (this is where you really do need a nozzle or you’re gonna have to fiddle around with poking a hole in the bottom of the buns separately!). Poke the nozzle gently into the bottom of one of the buns and pipe in the cream until it is filled. Repeat for all buns. If your cream is thick enough (and it should be) it will stay in the bun just fine.

To make the warm chocolate sauce,  break the chocolate into small pieces and put in a heatproof bowl, place the bowl over a pan of simmering water and heat. Add the butter and honey, stirring occasionally until the chocolate is melted. Gradually whisk in the milk until you have a smooth sauce and warm through. Drizzle the sauce of the cream filled profiteroles, serve and be the most popular person at the party/dinner/night alone in your pjs/mother in the office.

Don’t let me even worse than usual photography skills put you off attempting these, they barely take any time at all and people will think you’ve spent hours in the kitchen slaving away!

profiteroles with warm chocolate sauce

Pin this recipe:

profiteroles with warm chocolate sauce

Follow me on:

Twitter | Instagram | Pinterest | Facebook

Margarita Cupcakes

My favourite cocktail in a cupcake!

Image

If you know only one thing about me, let it be that I love tequila. I don’t drink it by itself anymore (I’ll leave that to my university days), but put in a cocktail and I’m there! Margaritas are my favourite, especially if they’re frozen. Living in the UK though I am horribly deprived of good margaritas, so I just stock up on them when I’m visiting Atlanta! Luckily, I have these yummy cupcakes to keep me happy while I’m at home!

Image

This recipe is not my own, I found it on the wonderful Sweet Revelations. I changed a few things around (like more tequila!), but at it’s core they’re the same. I didn’t use any lime curd and chose to garnish with a sugar, salt and lime mix. I also made mine full sized instead of mini (it makes about 14 full sized cupcakes)

Image

I loved these cupcakes so much I made them my banner image!

These cupcakes are flavoured with lime and tequila and topped with a lime and tequila swiss meringue buttercream. These cupcakes were the first time I had ever made SMBC and I was terrified, but it turned out perfect first try (what a great ego boost!) so if you’re feeling hesitant just go for it! I even made mine without a stand mixer (I wouldn’t recommend that though, it’s harsh on the arm muscles).

Image

Let’s get down to the important part shall we

Lime and Tequila Cupcakes

  • 1 1/2 cups flour
  • 1 1/2  tsp baking powder
  • 1/4 tsp salt
  • 1/2 cup unsalted butter, at room temperature
  • 1 cup caster sugar
  • 2 eggs,
  • 2 limes, zested and juiced
  • 1/4 tsp vanilla
  • 1/2 cup buttermilk, room temperature
  • tequila (for brushing)

Preheat the oven to 175C/350F and line a muffin tin with cupcake liners

Mix together flour, salt and baking powder in a bowl and set aside.

Beat the butter and sugar together on a medium high speed until pale and fluffy. Add eggs one and at a time and beat until fully combined. Add the lime zest and juice and mix well.

On a low speed, add the dry ingredients in three batches, alternating with the buttermilk. Mix until just incorporated.

Spoon until cake cases, about 2/3 full. Bake for approx 18 mins, until cakes are spongey and a cake tester comes out clean. Remove from oven and turn out on to wire rack to cool. Generously brush tequila over the cakes while they’re still warm. If you want the tequila to get right down in there, poke a few holes with a toothpick before brushing. Leave to cool completely.

Lime & Tequila Swiss Meringue Buttercream

  • 2 cups unsalted butter cubed, at room temperature
  • 5 large egg whites
  • 1 cup + 2 tbsp of caster sugar
  • 1 teaspoon pure vanilla extract
  • pinch of salt
  • 4 tbsp tequila (or to taste)
  • 1.5 tbsp lime juice

Grab a saucepan that is large enough to fit your mixing bowl in a few inches, fill it with a few inches of water and bring to boil, reduce to simmer.

In your clean mixing bowl (you’ll want to use the same bowl throughout the process) hand whisk the egg whites and sugar until just combined. Place over the simmering pot and whisk for about 4-5 minutes until the egg whites are hot (150F), the sugar should all be dissolved by then too. Place the bowl back on your stand mixer and using the whisk attachment whisk on medium until the whites have increased in volume and and the outside of the bowl is slightly warm to touch. Be patient because this can take 10 minutes!

Change to the paddle attachment (if you don’t have a stand mixer the beaters on your hand mixer will work fine, it’s what i used my first time making it). Beat on a low speed until the mixture is completely cooled. Increase speed to medium and add butter pieces one at a time. Scrape down the side of the bowl and continue to beat the buttercream until it is smooth and glossy. Don’t worry if the mixture starts to separate, just keep beating and it’ll come back together! Add vanilla, tequila, a pinch of salt and lime and beat until just combined. Pipe onto cupcakes immediately.

Lime, Sugar and Salt Garnish

  • 2 tbsp granulated sugar
  • 1/2 tsp salt
  • 1 tsp lime zest

Mix all ingredients in a bowl, sprinkle on top of freshly iced cupcakes! Finish it off with lime slices and peel!

Image

ooh look at those meringues in the background, watch this space for cupcakes involving those!

Sweet Potato & Cider Cupcakes with Marshmallow Frosting and Butter Toasted Salted Pecans

Inspired by bar food and just as yummy!

Image

I made these a while ago now and I didn’t take a lot of photos so this will be a pretty wordy post. It’ll be worth it though because these are pretty amazing cupcakes.

Image

The Vortex is an Atlanta institution and it serves pretty damn awesome bar food. Skipping past the burger with peanut butter and bananas that I always order, their sweet potato waffle fries that I get on the side are to die for. They serve them with marshmallow dip and the combination is awesome. When I was back home in the UK and longing for some Vortex food I thought “hey, why not make a cupcake version!” because that’s just how my brain works! And bar food is no good without a nice cold cider to go with it. And so this cupcake was born!

Image

The actual cupcakes taste like autumn and would be great with Thanksgiving dessert, but I would eat these any time of the year. The salty pecans offset the sweetness of the marshmallow perfectly too. They’re a great cupcake and a little on the different side too, which I always love.

They’re a bit long winded to make, but it’ll be worth the effort. I didn’t make quite enough frosting so I’d recommend adding 50% or doubling the recipe below.

Caramel Cider Sauce

  • 500ml apple cider
  • 1 vanilla pod, split length ways
  • 30g butter
  • 50g light brown sugar

Put the cider in a pan and bring to the boil. Add the vanilla bean and simmer for about twenty minutes until reduced by half. Add the butter and sugar and simmer for ten more minutes. Remove from the heat and leave to cool completely.

Sweet Potato & Cider Cupcakes

  • 115g unsalted butter, room temperature
  • 225g caster sugar
  • 2 large eggs
  • 225g mashed sweet potatoes, cold
  • 120ml apple cider
  • 1tsp vanilla extract
  • 190g plain flour
  • 1 tsp baking powder
  • 1 tsp ground cinnamon
  • 1/2 tsp bicarbinate of soda
  • 1/4 tsp nutmeg
  • 1/4 tsp salt

Preheat the oven to 190C/375F and line a muffin tin with cases

Beat the butter and sugar until pale and creamy. Beat in the eggs one at a time until incorporated.

Put the sweet potato, cider and vanilla extract in a food processor and whizz until smooth. Leave to one side.

Put the dry ingredients in a bowl and mix until combined. Add the flour mixture and the potato mixture into the butter mixture, alternating between the two, and beat until combined.

Fill the cupcake cases two thirds full and bake in the oven for about 18 minutes, until a toothpick comes out clean and they’re springy to touch.

Remove from the pan. Saving 6 tbsp, drizzle the cider sauce over the warm cupcakes. Leave to cool.

Marshmallow Frosting

  • 230g unsalted butter, room temp
  • 6 tbsp cider sauce
  • 212g jar of vanilla marshmallow fluff ((UK people can buy it here)

Beat the butter until smooth and creamy. Add 6 tablespoons of the cider sauce and beat until incorporated. Add the marshmallow fluff and fold in until fully incorporated.

Butter Toasted Salted Cupcakes

  • Large handful of pecans, roughly chopped
  • 1 tbsp butter
  • 1/2 tsp salt

Preheat the oven to 190C/375F and line a baking tray with baking paper.

Melt the butter and stir in the pecans. Spread them out on a tray and roast in the oven for about 5 minutes. Remove from the oven and sprinkle with salt and toss. Leave to cool. Sprinkle on top of frosted cupcakes then drizzle with any left over cider sauce.

Image